I'm participating in an online group on Facebook called The Documented Life. My pages are created in a Midori Travelers Notebook journal but most people are using a Moleskin journal. I created a fun framed doodle for one of the weeks challenges so here is my take on that challenge. I'm including a free printout so you can follow along with my steps. You can either print and trace my design or print it out on your computer. I have an inkjet with pigmented inks so it doesn't run when painted on and I can run heavy weight paper through the printer. If you don't have this type of printer you could take a heavy piece of watercolor paper to your local print shop and have them run it through one of their printers.
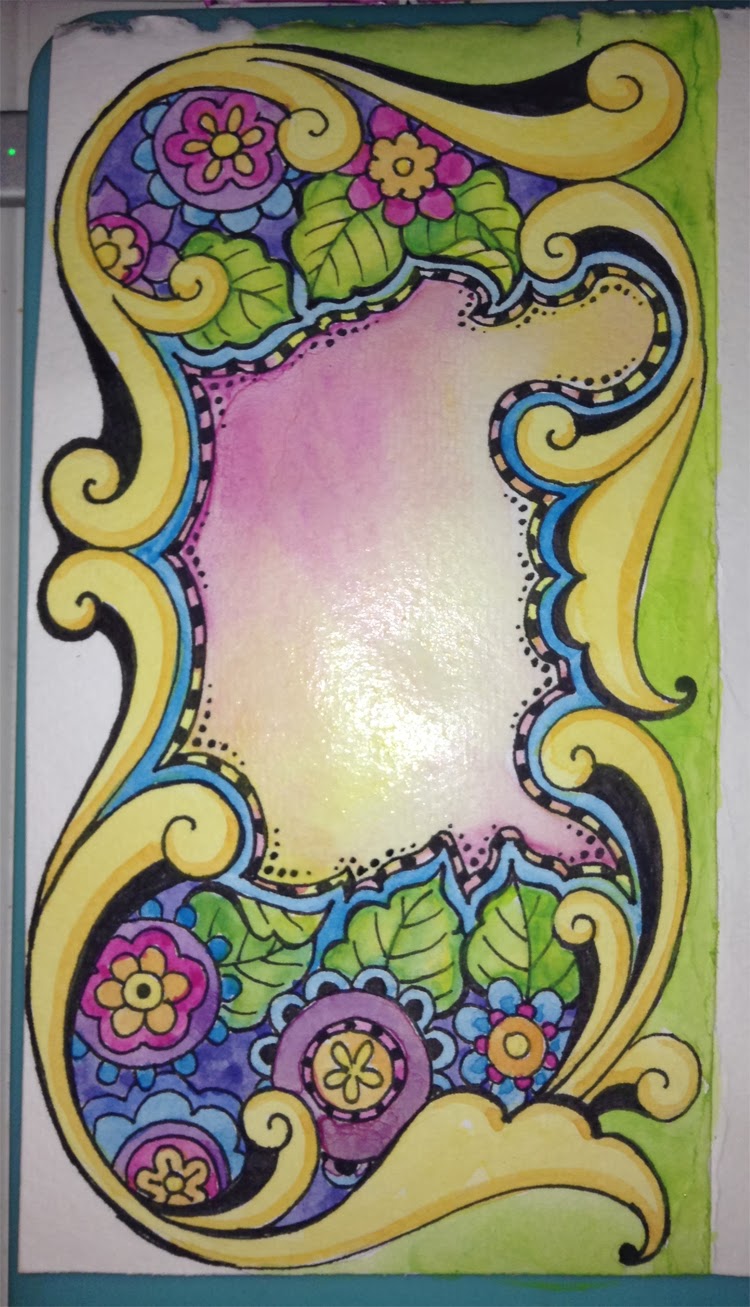
Here is the image to print or trace: Click on the image to get a larger version to use. Below you will find my step by step instructions for painting if you wish to follow them. :-)
My step one is to decide what I'm going to draw. Having a weekly challenge makes it easier because that part has been decided for me. The challenge for this week was a Doodle Frame or Boarder.
Here is my first step:
I created a quick doodle drawing of my signature swirls.
Then added some doodle flowers…. Usually I add these in corners or to the outside of the image.
I then used an sharpie to outline the image
….in this case but I have a line up of favorite waterproof
pens that I use. I also add fun touches like the checkered boarder
on the inside of the frame and dots!
Time to paint! I usually start with a light yellow first. Watercolor
works best when you go light to dark. But feel free to break the rules
if that works for you! :-)
start by basing in all the light yellow parts.
Here is mine but I haven't added yellow to the middle of the
flowers or the leaves yet.
After the light yellow has DRIED - yes you have to wait (it works best that way my dear).
Then I mix a dark yellow, or light orange…you choose! LOL
Pick a side to add a shadow to. It's your art just pick the side YOU
think a shadow would hang out on….the key is that they all should have
the shadow on the same side. This is what makes it look more realistic and
flows a lot better when you don't flip those shadows all over the place.
Here is mine with shadows created and also I had forgotten to add the light
yellow on the leaves and middles of the flowers. So while my shadows dried
I did worked on the flowers carefully not to touch those shadow areas.
Usually I would paint my leaves next but I got a little excited and wanted
some COLOR! I chose my brightest pink.
Plus I mixed a lovely shade of purple using my bright pink and a medium
blue. My favorite purple is made with bright pink and teal…but that's another story
as I was using a travel set here so I didn't have teal with me…LOL but this
purple was lovely.
A close up of the flowers before moving onto the leaves…well sort of as
these leaves had a base coat of light green...
So I painted the pink first and then waited…yes really….for the pink to dry!
I forgot to take a photo but then I added the purple to the flowers.
Now on to the leaves….
Then I chose a light green. To base in my flowers again.
The yellow underneath areas helps to create a "glow" but I paint mostly
over the top of the yellow.
Leaves based in with light green.
I mixed a medium green….I used that bright pink with a touch of
that dark green but you could use just a touch of blue with that light green too.
Then I sort of outlined the leaves working two to three leaves at a time.
Use the same shadow idea with your leaves…try to keep the shadow the same
as you had on your swirls.
BEFORE they dry…yes BEFORE you rinse off your brush and blend. See below.
Before letting the two to three leaves dry I clean the brush and "tickle" blend
the edges out to look like the above image. This take a little practice but you
can do it! Basically a clean brush and scrub in a little area until it blends with the
lighter background.
Here is the finished stage after the leaves are done.
After the purple was done I added blues. I had a light blue and dark blue.
The darker blue was used on the edge and the lighter blue was used on the inside of
the frame. I also used those blues to finish off the flowers.
You will also notice I added a yellow/orange watercolor to the checkered edge.
This next part is the trickiest (don't worry you can do it - promise)
The trick is to add just water to the inside frame area. A good wash of water,
don't be shy with it, and spread it all over the inside of the frame.
BEFORE it dries you are going to be adding paint…see below.
You will take a color of your choice…I used pink and yellow, and here
I have the pink on the brush and add to one of the edges or corners of your
frame.
While that is still wet (don't let it dry and work fast) you will add your
other color to one of the other edges or corners.
You will get something like this. If you need to rinse or clean your brush and "tickle"
the colors together slightly. Use a feathery touch for this.
This is what you should end up with. Notice the watery sheen to the page still.
it will take a while to dry. Let it dry at this stage.
Now you will need one of these…or something similar. Doesn't really
matter a white marker of your choosing. This is the FUN PART!!!
This is personally my favorite part….add your details….Dots, lines,
swishes, swirls you name it - take that handy dandy white marker…. which
ever one you use and PLAY!!!!
Dot your flowers, and create patterns with the white marker.
Don't forget those leaves. Where would the sun hit them?
Add a bit of a white mark there!
Time to get your scissor out and trim around one of the edges for added
interest. You can skip this if you want - just adds a little different look to your
page
YEAH you are done!
I hope you enjoyed this little step by step and will have fun adding it to your
planner or journal.